Kitchens
KITCHEN
Now I have done a post about kitchens before but this is a sort of moving forward update on the first one... LINK HERE

Or another post ....Neal and Sarah's Kitchen

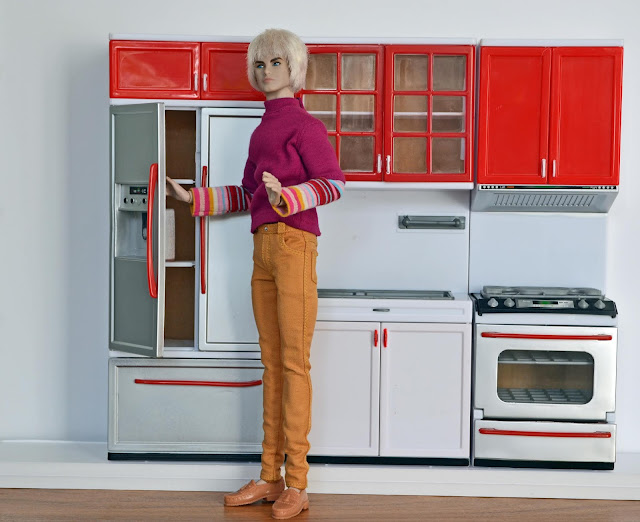
As always I think the modern Mattel stuff is way to small the best around by far for me is the Pedigree Sindy A line kitchen from the 70's.
OK, so it's yellow but you can easy change the door colours with spray paint or sticky back plastic. Pedigree also made a few other great kitchens.

A great modern kitchen is..... wait for it.....The Modern Kitchen! It's not expensive and comes in colours other than PINK!

It is a little short though, but a plinth of foamcore soon fixes that.
This kitchen is not very expensive and pretty much available worldwide from Amazon or E.Bay. It does come as a three unit or four unit run. Above is the three unit the four unit comes with a microwave.
As with most toys aimed at children it has it's issues in this post I hope to cover most of them as I see them.
First is height it's OK for the MTM Barbie or Momoko but for Integrity Toy dolls and some Barbie's it's to short.
The easy fix is to add a plinth. I added two 10mm strips of foamcore cut to size and covered with sticky backed plastic. Rather than make lots of single plinths I worked out how long the finished kitchen would be and made the one plinth the completed run in length.
My next issue was the height between the lower units and the upper. The dolls would have trouble using that worktop without banging their heads.
So I cut the top units off and with a little sanding I had them all separated.
This was a much easier job than I thought it would be and with a nice sharp saw I soon had them apart.
All was easy but I had a blip with the cooker as it had some electronic components (the hob lights up and makes a noise) so I will have to make a few adjustments with this unit.
I then re-sprayed the units white ...just because I felt like it!

I painted the inside of the oven black and the dishwasher I gave a chrome look. The back walls are made from cardboard and you could either cover with white sticky back plastic or just change out with white card.

Next up was issue with the upper units are the same depth as the lower ones. At first I thought I would cut some off the back of the units but then decided that would be waaaay to complicated.
So I decided that if I used a 10mm foamcore board for the wall I could cut out the units size on the board and sink them into the wall.
Before I could do this I needed to work out my layout and the height I wanted for my top units.
Now if I was going to use paper/sticky back plastic/ tile effect plastic etc this would be easy as I would not need to work around anything hard to cut like a real tile.


 Flooring


You can buy a pack of vinyl floor tiles for just a few £/$
You can also get real tiles for not a lot I always check out the 'dump' shelf where all the broken/missing parts/ no longer made stuff can be found.
So having decided on my tiles back to the building ..... The fridge/freezer also needed some height adjustment and as it already had a cupboard above one option would be a shelf below.
Another way would have been to add extra plinth for height....
Or just leave it short and you have a place for display above.
I also wanted some more counter space so I added some space for a wine rack and rubbish bin below and I might add some shelves above later?

For the worktop I again used foam core but this time 3mm covered in sticky back plastic.
Now I have been asked in the past about where to find sticky back plastic? It's pretty easy to find there are millions of designs on E.Bay or you could try DIY stores, Art stores or places like Target, K Mart etc.
For some extra work space... In my original post (link above) I simply covered a cat food box for an instant island.
Interesting fact.... the cat food box and the kitchen units on a 20mm plinth are the exact same height, fancy THAT!

But this time I added a top with a lip to give me a breakfast bar.
You could also put the sink here and then have more worktop space.


Now I have done a post about kitchens before but this is a sort of moving forward update on the first one... LINK HERE

Or another post ....Neal and Sarah's Kitchen

As always I think the modern Mattel stuff is way to small the best around by far for me is the Pedigree Sindy A line kitchen from the 70's.
OK, so it's yellow but you can easy change the door colours with spray paint or sticky back plastic. Pedigree also made a few other great kitchens.

A great modern kitchen is..... wait for it.....The Modern Kitchen! It's not expensive and comes in colours other than PINK!

This kitchen is not very expensive and pretty much available worldwide from Amazon or E.Bay. It does come as a three unit or four unit run. Above is the three unit the four unit comes with a microwave.
As with most toys aimed at children it has it's issues in this post I hope to cover most of them as I see them.
First is height it's OK for the MTM Barbie or Momoko but for Integrity Toy dolls and some Barbie's it's to short.
The easy fix is to add a plinth. I added two 10mm strips of foamcore cut to size and covered with sticky backed plastic. Rather than make lots of single plinths I worked out how long the finished kitchen would be and made the one plinth the completed run in length.

So I cut the top units off and with a little sanding I had them all separated.
This was a much easier job than I thought it would be and with a nice sharp saw I soon had them apart.
All was easy but I had a blip with the cooker as it had some electronic components (the hob lights up and makes a noise) so I will have to make a few adjustments with this unit.
I then re-sprayed the units white ...just because I felt like it!


Next up was issue with the upper units are the same depth as the lower ones. At first I thought I would cut some off the back of the units but then decided that would be waaaay to complicated.
So I decided that if I used a 10mm foamcore board for the wall I could cut out the units size on the board and sink them into the wall.
Before I could do this I needed to work out my layout and the height I wanted for my top units.
Now if I was going to use paper/sticky back plastic/ tile effect plastic etc this would be easy as I would not need to work around anything hard to cut like a real tile.
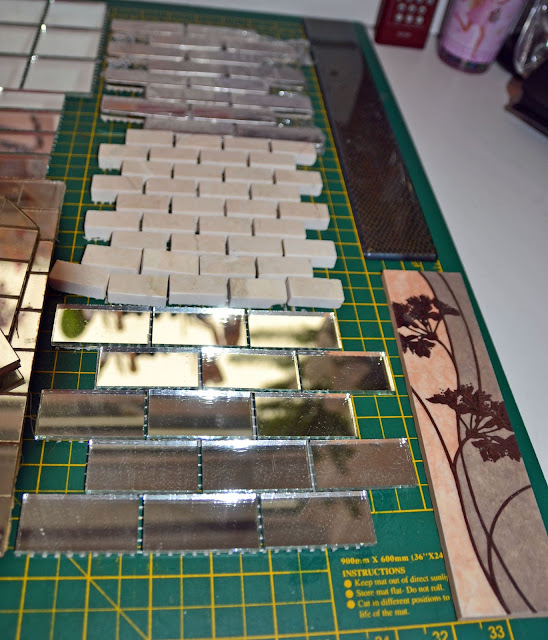
Wallpaper tiles (free samples)

Doll house tiles

Sticky back plastic tiles

3D Sticky back plastic tiles (love these)


Counter top samples (free samples)

Fake tiles (free samples)

With a polystyrene back??? ( free samples)

Vinyl samples (free samples)

Wood effect Wallpaper (free samples)

Upholstery fabric for mats (free samples)

Vinyl floor tiles

Real tiles and boarder tiles most are free samples or from the discount shelf.

If you are going to use real tiles then you will be best off letting THEM dictate to you about length and height


You can buy a pack of vinyl floor tiles for just a few £/$
You can also get real tiles for not a lot I always check out the 'dump' shelf where all the broken/missing parts/ no longer made stuff can be found.
So having decided on my tiles back to the building ..... The fridge/freezer also needed some height adjustment and as it already had a cupboard above one option would be a shelf below.
Another way would have been to add extra plinth for height....
Or just leave it short and you have a place for display above.
I also wanted some more counter space so I added some space for a wine rack and rubbish bin below and I might add some shelves above later?

For the worktop I again used foam core but this time 3mm covered in sticky back plastic.
Now I have been asked in the past about where to find sticky back plastic? It's pretty easy to find there are millions of designs on E.Bay or you could try DIY stores, Art stores or places like Target, K Mart etc.
For some extra work space... In my original post (link above) I simply covered a cat food box for an instant island.
Interesting fact.... the cat food box and the kitchen units on a 20mm plinth are the exact same height, fancy THAT!

But this time I added a top with a lip to give me a breakfast bar.
You could also put the sink here and then have more worktop space.


To cover cat food box and if you are putting the sink in here make a hole bigger than the sink. (The sink will not fall through as it will be fitted to the work top)

Once I had 'tiled' the wall with a free wallpaper sample, this was the easy option as real tiles would need cutting and a lot of fiddling about. Finally it was time to work on the upper units and for this I felt I might need some help so I called in the builders


I see that have plenty of tools for all manor of jobs

With all that strange electrical going on's behind the cooker this needed to be the first unit to be fitted

After I had this in where I wanted it I used a piece of double sided tape to hold it in place. The tiles had supplied e with an easy way to follow the top line and once I had the other units in the right place I cut around them as close to the unit as I could. Next step ...just push the units into the holes!
This all new kitchen did not go without a few hick-ups that I hope I have now sorted out and I do have another.....ahmm......ten of these kitchens to practice on although they are all the three unit style! So a range of colours and assorted arrangements will be coming soon(ish)
Now if you want to try this and are having any problems or need 'how too' photo's please just ask
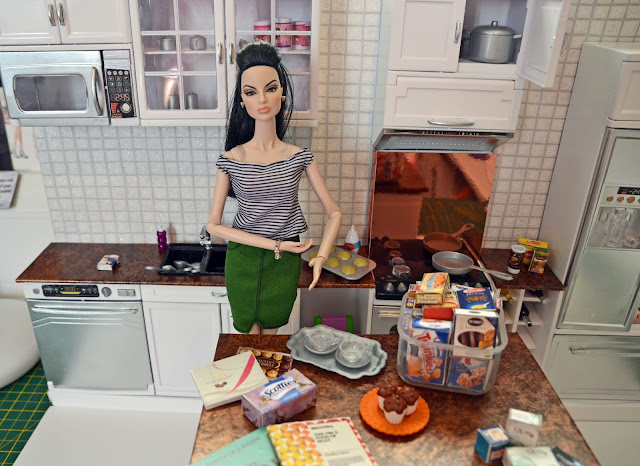
The Finished Look


With a fashion Royalty doll for size


And a MTM Barbie doll


I also added some doors or the Island

Both dolls together to see the height difference

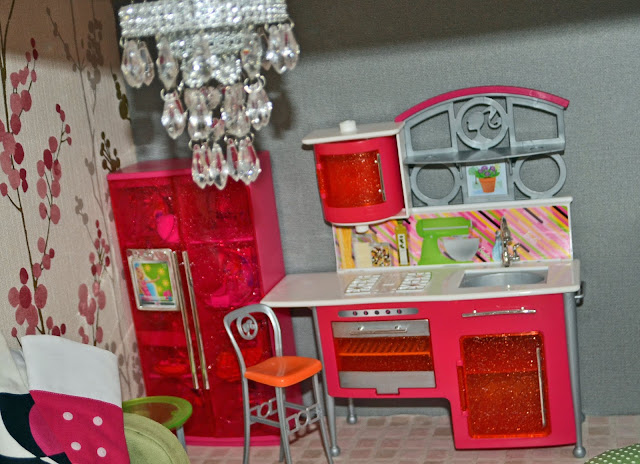
Just for fun a few of my other kitchen pieces


.JPG)
You have such a good eye for decorating! You also have such a deep collection of craft supplies, although as you've said in the past, it must get a little overwhelming!
ReplyDeleteOutside of the UK, sticky back plastic is self-adhesive plastic, for people who want to search online. I've also seen the term self-adhesive wall covering used on eBay, at least for the bigger rolls. I've never seen small squares of what you called sticky back plastic tiles up above. I have seen rolls in a similar tile print on eBay, though.
Thank you so much for looking and commenting. Thanks, for the extra information on the 'sticky back plastic'. I found the 'tiles' on a catalogue website will have to see if you can get them anywhere else?
DeleteWow, amazing kitchen! I also create risers for my kitchen cabinets as they are usually too short for our dolls. I have used styrofoam packing material which I cover with duck tape or shelf paper. Here we also call the "sticky back plastic" "decorative shelf paper with adhesive backing". Can get it at Amazon, craft stores, Walmart, etc. I absolutely love how you recessed the upper cabinets into your wall! So much work, but it looks awesome!
ReplyDeleteThank you, it was a lot of work this time as I was not sure what I was doing or how it would come together, but now I have it I'm hoping the others will be a lot easier
DeleteI have been away from these sites, and it was great to come back to yours! You have some of the coolest sets!! :)
ReplyDeleteSo pleased you are back and thank you for your lovely comments
Delete