Fireplaces
Fires can be an interesting addition in a doll room.
A lot of modern homes have underfloor heating and no longer have fireplaces.
But over the I have accumulated a few Barbie and some Sindy too.
For me the Sindy ones are the best, a better size and shape. Plus they often light up.
I thought I might have a go at making a modern one...or two.
If all else fails and you want a fire in you dolls home, print it!
This is a rather fun fireplace originally in red (nice change from PINK). This was one of my first experiments and I hand painted it an off white colour. I will one day give this a bit of an upgrade as I've learnt a lot over the years. Not sure what at the moment hence it still as is!

My dad is a model train enthusiast (OO scale) and I have over the years had a lot of help from him and also been to many a model railway show where I have picked up some interesting items that I can re-purpose. Below is one of those items a railway arch that I have painted (again a long time ago) and I need to add some grouting and maybe a wash?

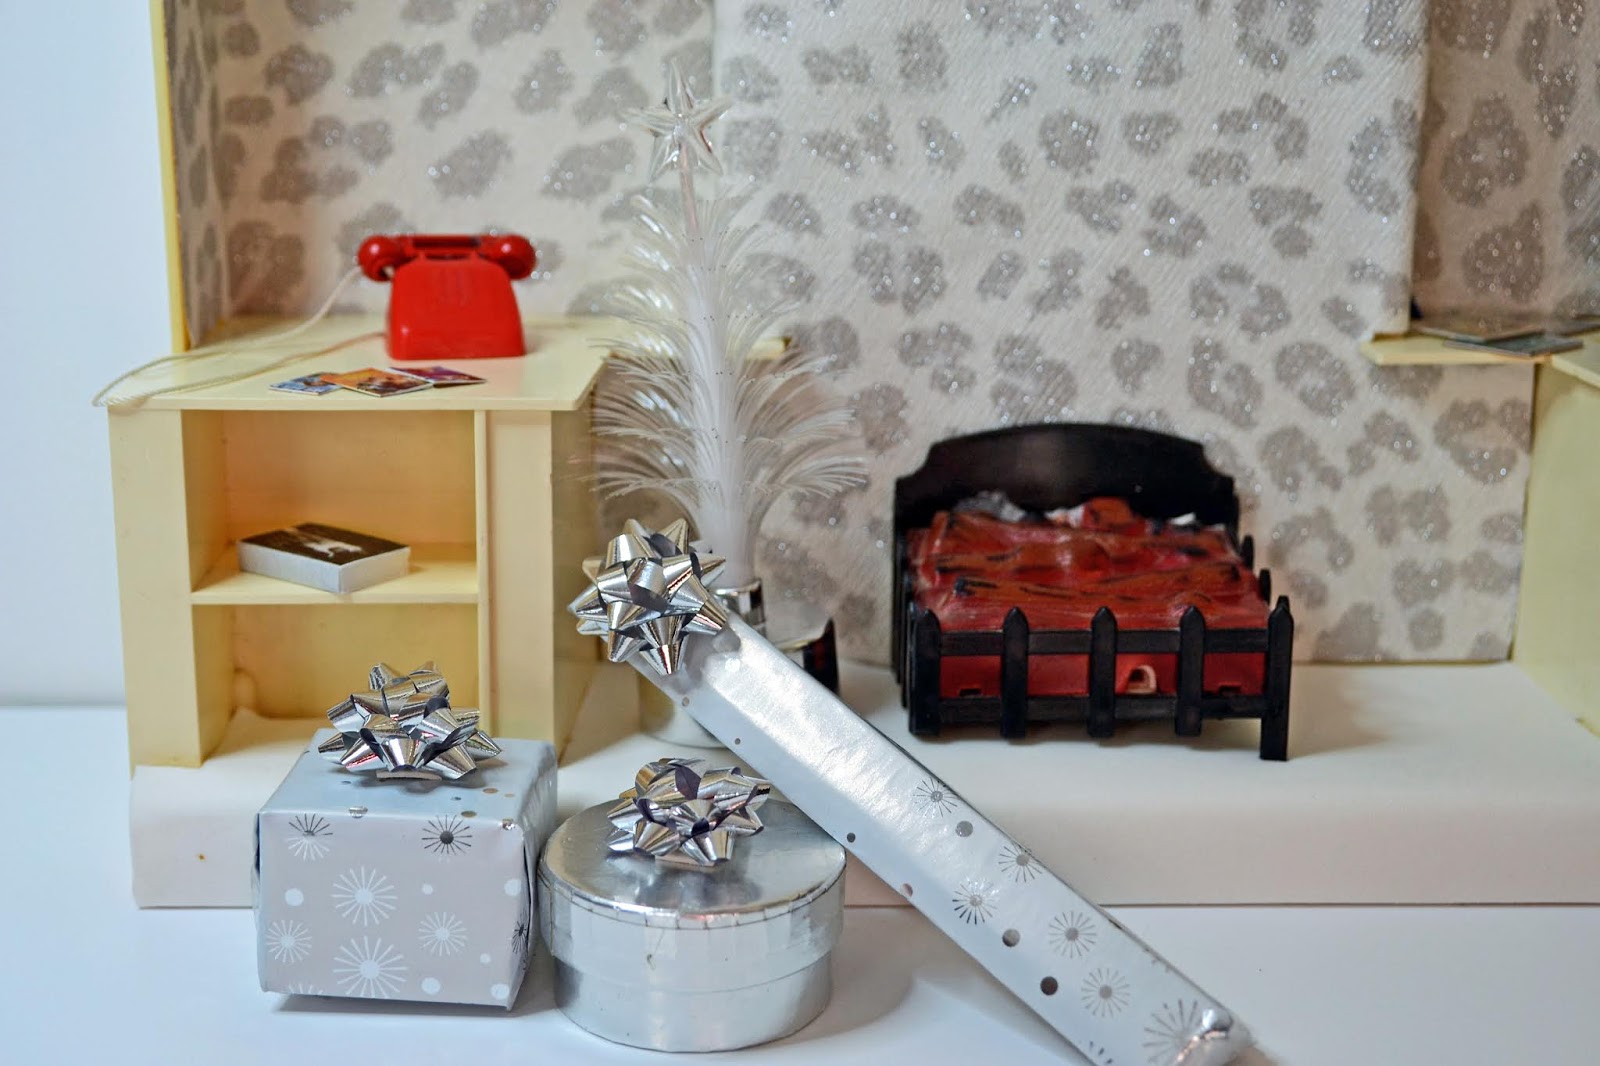
Below is a Sindy fire , I came in the cream and I repainted it to black. This is one of my favourite fires as it lights up. Unfortunately the bulbs don't work and I need to find replacements. While these fires are easy enough to still find on E.Bay around Europe they are not easy to find in America.


Another way to make an easy more modern fire is to convert a photo frame. I'll show you more on that later.

These are cut outs I found in magazines and once glued onto some card will make great easy to use fires.

I wanted to make some on trend fire places/firewalls, I think these plastic boxes might be very helpful
Along with some card, glue, glue gun, beads, wood, foam core and a few other things I've not thought of yet.....

This has a fire and one of the BEST things ever made (in my opinion).....Sindy's Wall Of Sound


So now lets start making some fireplaces


I have collected together some plastic boxes. The ones from IKEA had quite a lot of writing and stuff on them and all the writing I was able to remove with nail varnish remover.
Fireplace One

Remover does not work on all though, this was a box for Christmas cards

So I decided to cover the back in white foam (paper or card would be fine) to cover the writing.

I put a peace of paper in the bottom

I decided to use a 20 pea bulb battery lights in red so needed a hole for the wire to come out


I changed out the paper for a peace of 3mm foam board with ten small holes in it

Threading the cable through the small hole I made in the plastic base.

Twist the wires together to make the underneath as flat as possible

It will then look like this

Add some small garden shingle

I brought mine in IKEA.

I built a basic box around the bottom


The space at the bottom houses the battery box.
..........................................................................
Sometimes things are not so easy.... today's craft invader is Jordan Banjo!


Fireplace Two
I had a biggish clear box, unfortunately the cat jumped on it and it became broken on one side. I was planing on having this in the centre of the room
but now it will have to go against the wall. I lined this side with white paper. I then removed the flap at the bottom but left it at the top to help with stability.


I covered the inside with a thick coat of glue and then covered with mini stones. (Found in the indoor garden section at my local DIY)

Slide the box over the fire unit and then the loose bottom part (just to keep the candles in place). Leave this loose so you can remove it to turn the candles on and off.

I added some foam core to fit the top Most of my rooms are about 42cm (16 1/2 inches) as that's the height of the foam board I use.

And today's 'helper' is Ashley Banjo (note how she like to lean on my arm as does her son Jordan.)
Fireplace Number Three

Cut up an egg box into smallish pieces


sand the corners if needed

I had never done this before so was not really sure what I was doing? First I laid the pieces on the 5mm foam board

Them I glued them on, I used school glue. First I pasted the board and them the egg box piece. I did the front first and weighed it down so the edges did not curl. Then each side again weighting it down while it dried

I painted everything with white paint, including between the 'bricks' and the edges.

I mixed in a little black and this time just painted the 'bricks', Sometimes I added a little more black.

For the base I used a box end and did pretty much as I did with fireplace one.

Back view

Fireplace number Four
For this one I used some small logs I had found before Christmas.
I cut out the back and sides from black foam board. I've not given sizes on any of these as it's really up to you and the boxes you have as to what size things should be. I then cut the base about twice the depth on the upper sides. Make the front the same width as the top and add sides again cut to size.

I made the base deep enough that I could store the battery pack underneath.

I made a hole fore the wire to go through and layered the wood with the wire lights running through, gluing in place as you go.

I then slotted this in behind the wall. Once the wall is papered I will add a trim around the edge. Just to give it a clean finish.

Fire Place Five
This is a model railway arch I painted it cream.
Fixed a piece of black foam core board to the back and the base.

This fire was from a catalogue that I cut out and glued to black foam

I edged the fire base with back electrical tape.
Fire Place Six
Print off a picture of a fire and insert it into the frame

Fire Place Seven
I found this wallpaper with a textured feel and a slight glitter effect

I used a black backing to make the fire place and the fire is a photo glued to a foam backing.

The base is just a peice of white foam board cut to size.

A back view. I also added a peice of foam board to the top to keep it straight.
.......................................................
A look at the finished fires
These are all temporary dioramas .....


.JPG)
Thank you for all the tutorials! Everybody looks warm and cozy. I'm fortunate enough to have a Sindy fireplace that I bought on eBay in the US.
ReplyDeleteYes, Sindy did wonderful fire places!
DeleteYou have some great ideas here, and some good tutorials. Thanks for sharing!!!
ReplyDeleteThank you, Sandi!
DeleteGreat inspiration!
ReplyDeleteThank you, Rarrie!
DeleteWow - that's a lot of clothes! I have just started on my dolls again - children and work got in the way... Lol. Now that they have grown up I can be a little selfish again! Thank you for all the inspiration here. <3
ReplyDeleteThank you
Delete